


Workwear Guru is reader-supported. When you buy through links on our site, we may earn an affiliate commission. Learn more
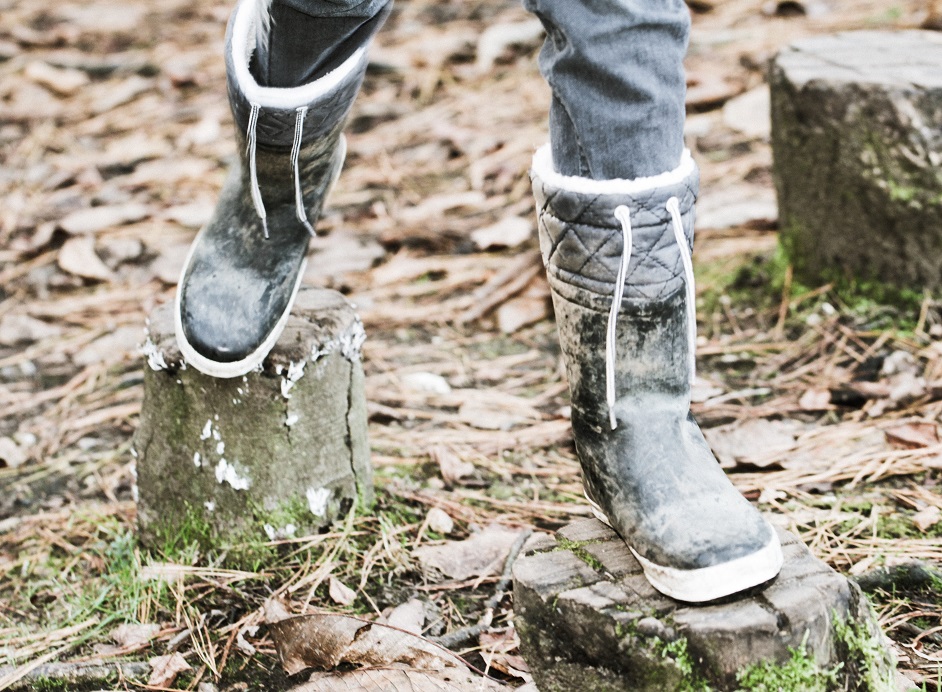
Many professions require work to be done outdoors and in different atmospheric conditions. In this way, the workers’ clothing must adapt to the weather and the environment. Rubber boots are one of the most widely used types of boots, especially for working outdoors, as their material makes them suitable for all kinds of weather conditions.
Gardeners, seasonal workers in the fields, construction workers, and ordinary people on rainy days pick rubber boots as the ideal solution for the rain and the damp soil.
In addition, rubber boots offer foot comfort and safety at work due to their multi-element-resistant material. Besides, they are easy to clean.
Nevertheless, they can and do get damaged quite often. But you do not have to throw your rubber boots away so quickly and you can fix them at home in just a few steps. Stay with us and learn how to repair rubber boots.
How To Repair Rubber Boots?
There are many ways in which your rubber boots can be cracked or damaged. Thus, how they are repaired also differs.
Generally, you will need to clean your boots before repairing them.
As for the tools, you will need boot adhesive, a dry cloth, gloves (for protection), and a few other elements. It won’t be costly or energy-consuming, and you won’t have to throw your boots away!
Below you can read different repairing methods depending on the problem.
How to fix cracked rubber boots?

One of the most common damages of rubber boots is cracks. They can be cracked easily on some spots because they are used in different outdoor terrains and, sometimes, in severe weather. Cracks can be annoying as it allows water and dirt to come inside your work boots.
One of the easiest and most efficient ways to repair cracks is with shoe adhesive. For this method, you will need:
- shoe adhesive,
- abrasive paper,
- water,
- a dry cloth,
- regular tape, and
- a brush to spread the adhesive.
You can find such adhesives in most big stores or order them online (sometimes they have the icon of the boots on the packaging).
The first thing you need to do is clean the rubber boots and dry them, especially in the crack area. Then continue by using abrasive paper to make the surface of the rubber boot harsher so that the adhesive works easier and faster.
Continue the work by isolating the crack with tape so that the adhesive does not spread too much. Carefully place the adhesive on the damaged area, without exceeding the surface isolated by the tape.
Now it is time to let it dry for a few hours, depending on how much the adhesive of your choice takes to dry. At the very end, remove the tape carefully, and the boots are ready to be used again.
How to fix a leak in rubber boots?

Another fairly common damage to rubber boots is leaking, and they need to be repaired; otherwise, rubber boots remain almost unusable.
To repair leaks, you can apply standard adhesive and follow the same procedure as with crack repairing. But such a repair is only temporary, and the leaks will return after some days of wearing the boots.
A more effective method of repairing leaks in rubber boots is the use of rubber cement. The latter is a strong element composed of adhesive and some chemical elements, which create a liquid and adhesive mass. Rubber cement works so that it joins the rubber parts and does not allow the introduction of water or anything else.
You will need:
- rubber cement,
- water,
- (optional) a dry cloth, and
- (optional) plastic gloves.
Same as fixing cracked rubber boots, start by cleaning and drying the boots in the leak area. Then, carefully apply rubber cement to the place where the leak is with a small brush. After you are done, allow the rubber cement to dry completely. A few hours later, you are good to go to work with your rubber boots on.
How to fix rubber boots soles?

Soles are one of the most easily damaged parts because they are in direct contact with the ground. Due to hard terrains, harsh conditions, or exposure to chemicals, they can be torn and cracked.
This, too, is a few-steps-process you can easily do at home. You will need clean water, a dry cloth, plastic gloves, shoe adhesive, and a brush.
The repairing procedure is similar to the one mentioned above, only that you need to be more careful when fixing the soles.
To fix the rubber boots soles, follow the steps below:
- Clean the bottom of the boot with water.
- Dry the soles using a dry cloth or let them dry naturally.
- Put on plastic gloves.
- Take an adhesive (random shoe adhesive) and carefully place it where the sole is damaged.
- Apply the adhesive with a brush to create a flat surface,
- Let it dry completely for a few hours, then wear your boots as usual.
If the sole has been detached from the boot, then it is best to use rubber cement instead of adhesive. After that, press firmly with your hands and make sure the sole sticks well, and wait for it to dry before you wear them.
How to fix rubber boots on the go?
It happens that your rubber boots are damaged while you are working in an area away from home. A good solution for how to repair rubber boots fast and easily is to keep a small emergency box with adhesive or rubber cement. You can also use some rubber patches, which are also used for bike tires.
Fixing rubber boots on the go might not be perfect, but it will do the job for a while.
How to repair rain rubber boots?

You can repair your rain boots similarly to other types of rubber boots.
If your rain boots have any split or holes, then use rubber adhesive or any clear shoe adhesive; apply it where the boots are damaged, stretch it well and let it dry.
Maintenance Tips For Rubber Boots
Shoes and boots will generally last you as long as you take care of them and maintain them. If they are slightly damaged, it does not mean that you have to throw them away. With a bit of care, they will last long enough.
Clean boots regularly (inside and outside)
One of the easiest and most important ways to maintain rubber boots is to keep them clean. As with any clothing, cleanliness comes first and is especially important for rubber boots as they are used outdoors and inevitably get dirty.
One thing you should always do is to wash your rubber boots every time after using them. To do so, wash them inside and out with water, dish soap, and a sponge. Finish off by allowing them to dry completely at room temperature.
Condition your rubber boots
Another suggestion to maintain rubber boots is to condition them regularly. Online and in-store, you can find many rubber boots conditioners that mostly come in liquid form.
To condition your rubber boots first, clean them, and continue to apply conditioner carefully, spreading it over the entire boot’s surface and allowing it to dry completely.
Store rubber boots the right way
How you store your boots plays a key role in their longevity.
Make sure to place them in a room with clean air, away from the sun or other sources of heat. In addition, ensure that there is no water or humidity in the place where your rubber boots are. The humidity might damage your boots in the long term.
The Bottom Line
Your rubber boots are indeed valuable for you, so it is worth trying to repair them when they are damaged. You do not have to be an expert or a shoemaker to take care of such a thing; most of the time, you can fix minor damages to the rubber boots with a shoe adhesive. After all, it is also quite fun!